
How to master blur in product photography
One Blurry photo is rarely recoverable, even with the best retouching or artificial intelligence tools. To ensure clear visuals from the moment you take a shot, it is essential to understand where the blur comes from — and especially how to avoid it. Whether you are shooting jewels, of goggle, of technical objects Or cosmetic packagings, sharpness is a quality criterion... and a credibility issue.
In this article, we review the main Causes of blur, their impacts on your product visuals, and concrete solutions to get perfectly sharp images, without having to correct afterwards with Photoshop or Adobe Express.
Blur motion: a tremor may be enough
Generalized blur throughout the photo, with no clear area, is often caused by a slight movement of the device at the time of triggering. In sectors where precision is essential — watchmaking, jewelery, Eyewear —, the slightest vibration is visible.
How do you recognize it?
No area of the image is clear, and some contours appear to be “duplicated.” Even if the focus is correct, the blur persists.
Solutions:
Use optical stabilization or sensor
Many cameras and lenses incorporate a image stabilizer. On some Canon lenses, a button IS allows you to activate this function. The most recent systems, equipped with 5-axis stabilization, offer excellent image maintenance, even when handheld and at low speed.
Adopt a stable posture
Even before touching the settings, stabilize your grip. Hold the device close to the face, elbows along the body, and preferably use the optical viewfinder rather than the rear screen. This posture limits the micromovements responsible for blur.
Respect the rule of the inverse of the focal length
It is advisable not to descend below a speed corresponding to 1 divided by the focal length used. For example, at 50mm, avoid going below 1/50s. With stabilization activated, you can go down a bit lower, but that depends on the hardware used. To be tested according to your configuration.

Use a tripod
When the light is low and you want to maintain optimal image quality without increasing the ISO, the tripod is indispensable. It allows long exposures (1/4s and more) No blur of movement. Note: when the camera is attached to a tripod, turn off the stabilizer, which could generate unintended blur.

Work with homogeneous lighting
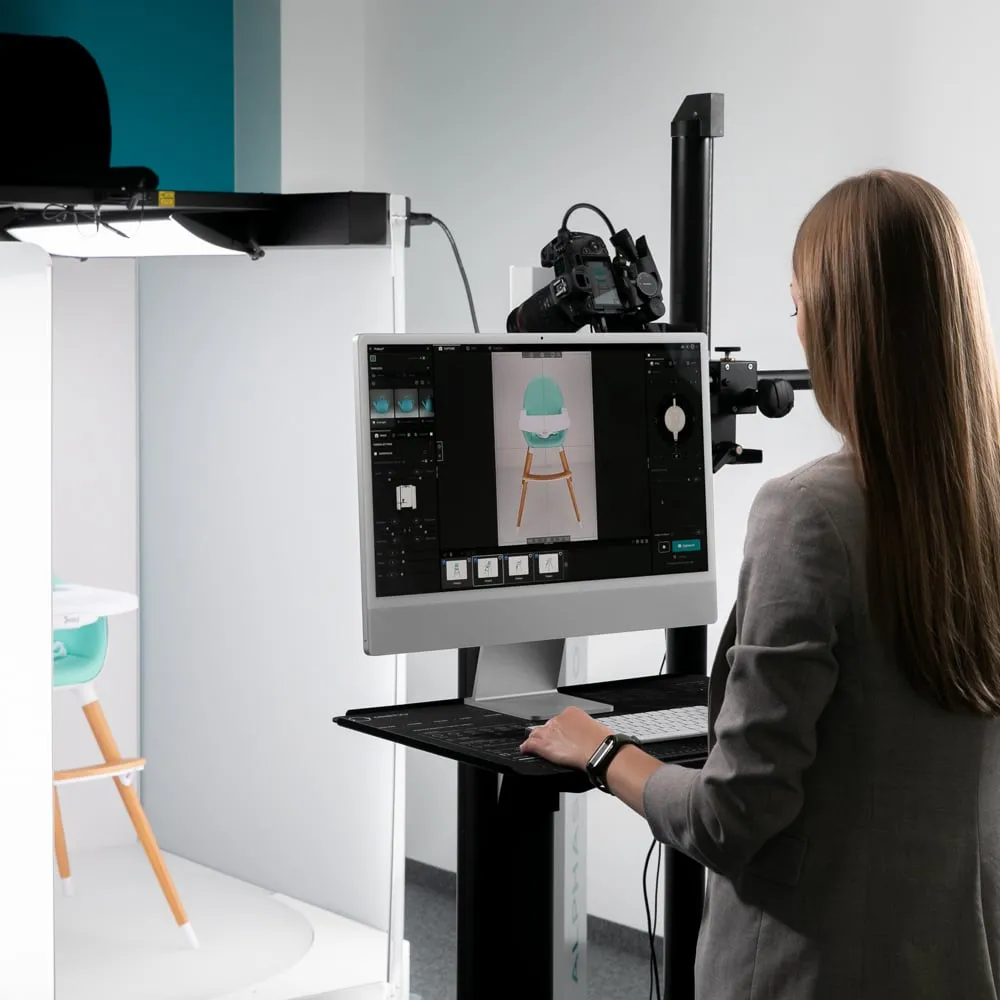
One continuous and powerful light, similar to daylight, allows you to maintain a low ISO sensitivity while maintaining a sufficient shutter speed. This is one of the great advantages of automated photo studios like those offered by PackshotCreator. They offer a stable and optimized light environment, essential for shooting complex or reflective objects.
Focus blur: a misplaced sharpness
This type of blur occurs when the Focus is done in the wrong place. Some of the image is in focus, but it's not the right one. This phenomenon is common in product photography at short distance or in macro photography.
How to identify it?
At first glance, the photo seems correct, but when zooming in, we see that The sharpness point is slightly forward or backward of the targeted subject.
Solutions:
Choosing the right autofocus point
In packshot photography, it's best to avoid zone autofocus mode. He alone decides where to take stock, sometimes wrongly. Use a central collimator or a specific point selected manually to target exactly the area of interest.

Selecting the right autofocus mode
To shoot a fixed object, choose a point focus mode. On Canon, it's the mode One Shot ; on other brands, it may be AF-S. As long as you hold the shutter button halfway, the point stays locked until the shot is taken.
Close the aperture to broaden the depth of field
TO Full opening (for example at f/1.8), the The sharpness zone is very short — sometimes barely a few millimeters. For better sharpness, it is recommended to close at f/4 or f/5.6. In addition to gaining depth of field, you will get an image with more details, also called stung. Most lenses offer their best shot between f/5.6 and f/8.
Focus stacking: the solution for perfect sharpness over the entire surface
En macro photography or on highly detailed objects, even a small depth of field is not enough to get a completely clear image. The solution is to use the technique of Focus Stacking.

Principle:
Take several photos of the same subject, in moving the focus slightly every time you take. Then, software assembles the sharp areas of each image to create one. perfectly clear in its entirety.
This method is particularly useful for shooting:
- Of gemstones,
- Of watch mechanisms,
- Of very small objects with relief.
Conditions to be respected:
- Use a tripod, to avoid moving the device.
- Do not change the light or the angle.
- Have a tool for precise control of the focus, or an automated system.
Chez PackshotCreator, some solutions such as Alphashot Pro G2 allow this process to be automated. The embedded software controls the Focus Stacking, thelighting And thealignment in a perfectly synchronized manner, for a professional visual rendering, without retouching.
Conclusion: prevention is better than correct
Correcting a blur after the fact remains a limited operation, even with powerful tools. It is better to adopt from the start The right gestures, the right settings, and working in a controlled environment.
In product photography, sharpness is a basic requirement. It cannot be improvised. Automated studios like those offered by PackshotCreator, combined with a good mastery of shooting techniques, make it possible to produce sharp, accurate, and rewarding images for your products, from the first capture.


